Setting up your library
When you sign up, we ask two questions: how you would like your library to be secured, and what you would like your library to be called.
How your library locks
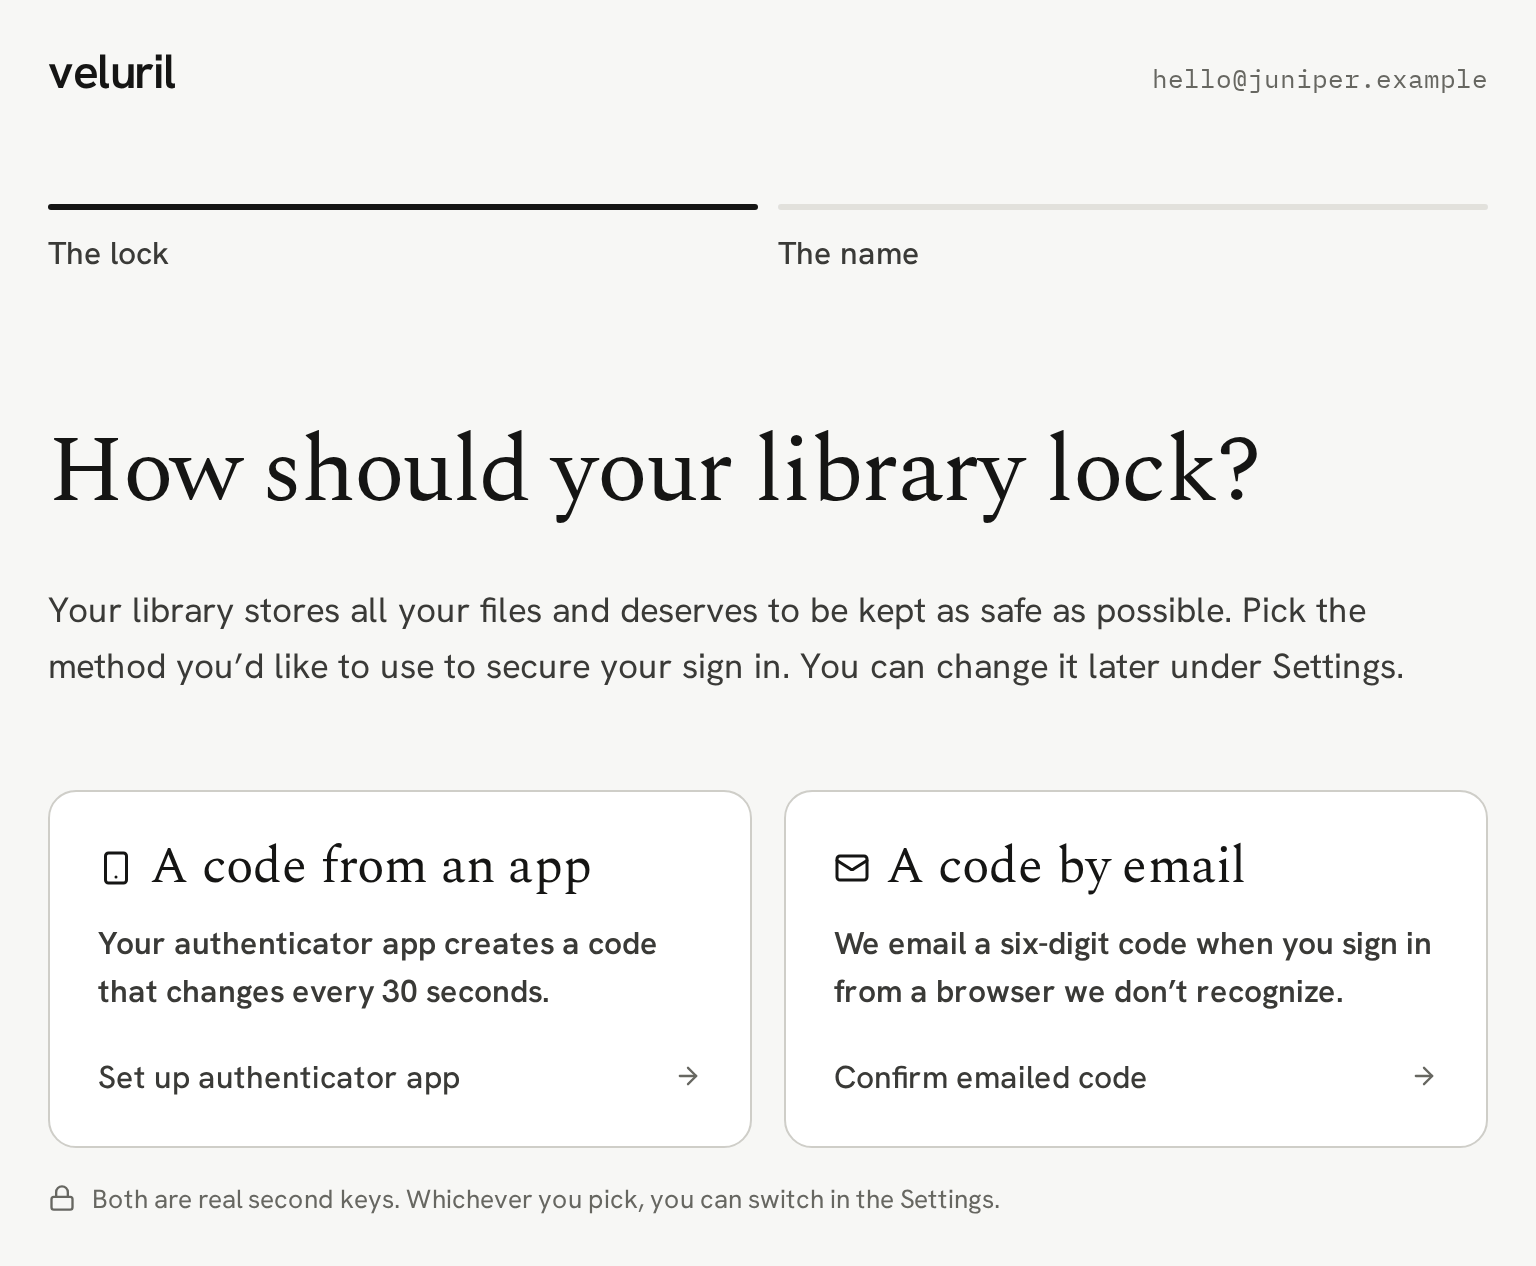
Your library holds all your files, so signing in from a browser we don’t recognize takes a second key as well as your password. Pick the one you’d like to use:
Both are real protection.
Both options are good and neither is better than the other, and whichever you pick, you can switch to the other in Settings.
A code from an app
Click "Set up authenticator app" and scan the QR code with the authenticator app you use, such as 1Password, Authy or Google Authenticator. Type the six-digit code it shows you, then click "Verify and turn on":
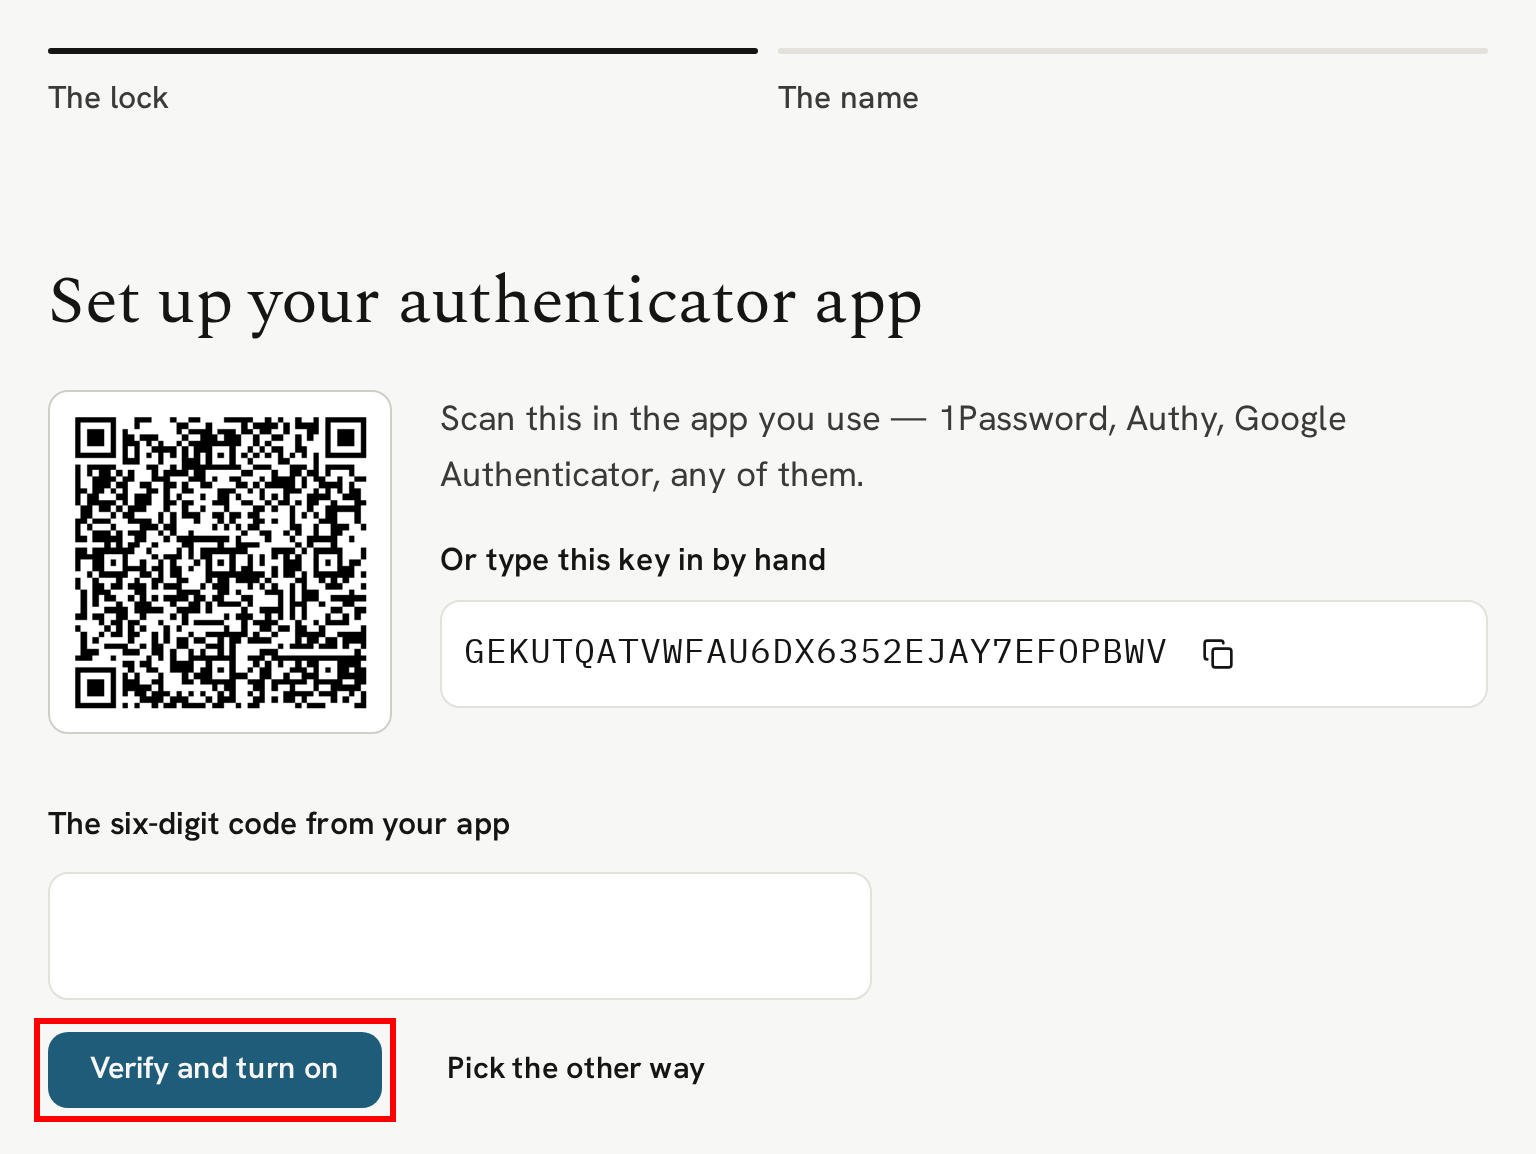
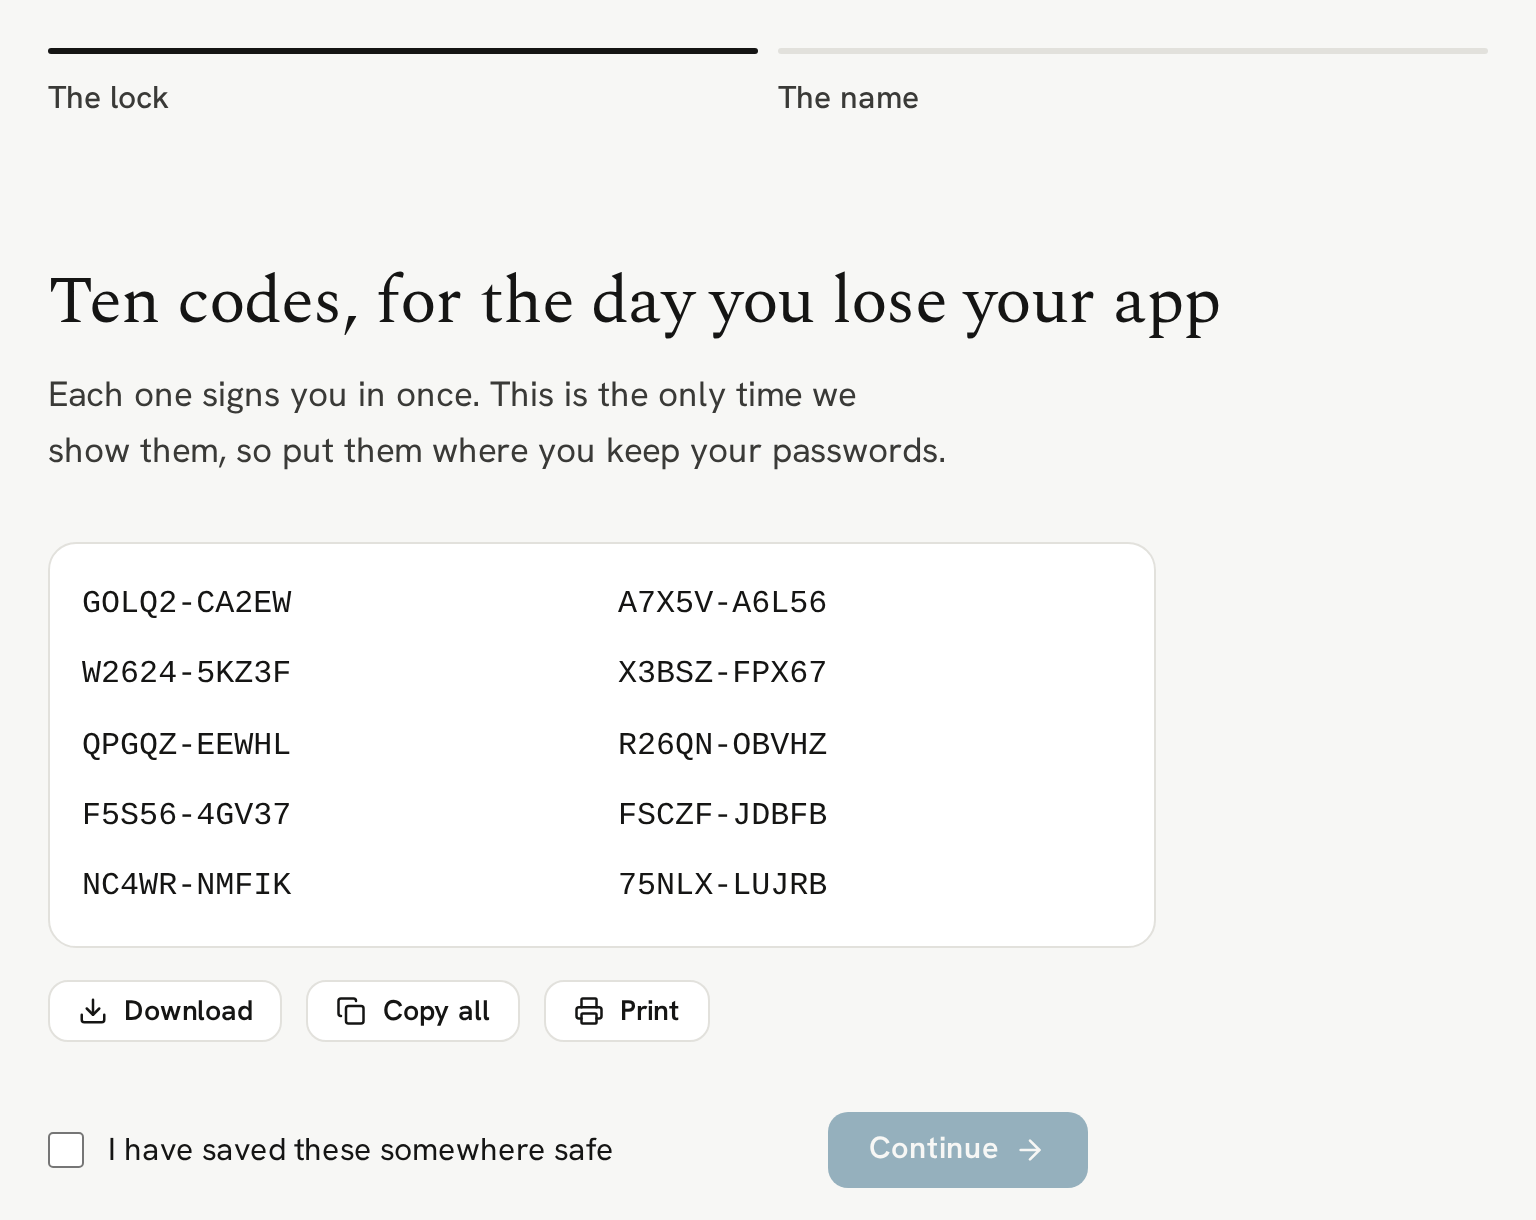
Next come ten backup codes, for the day you lose your app. Each one signs you in once, and this is the only time we show them, so download, copy or print them and keep them with your passwords.
A code by email
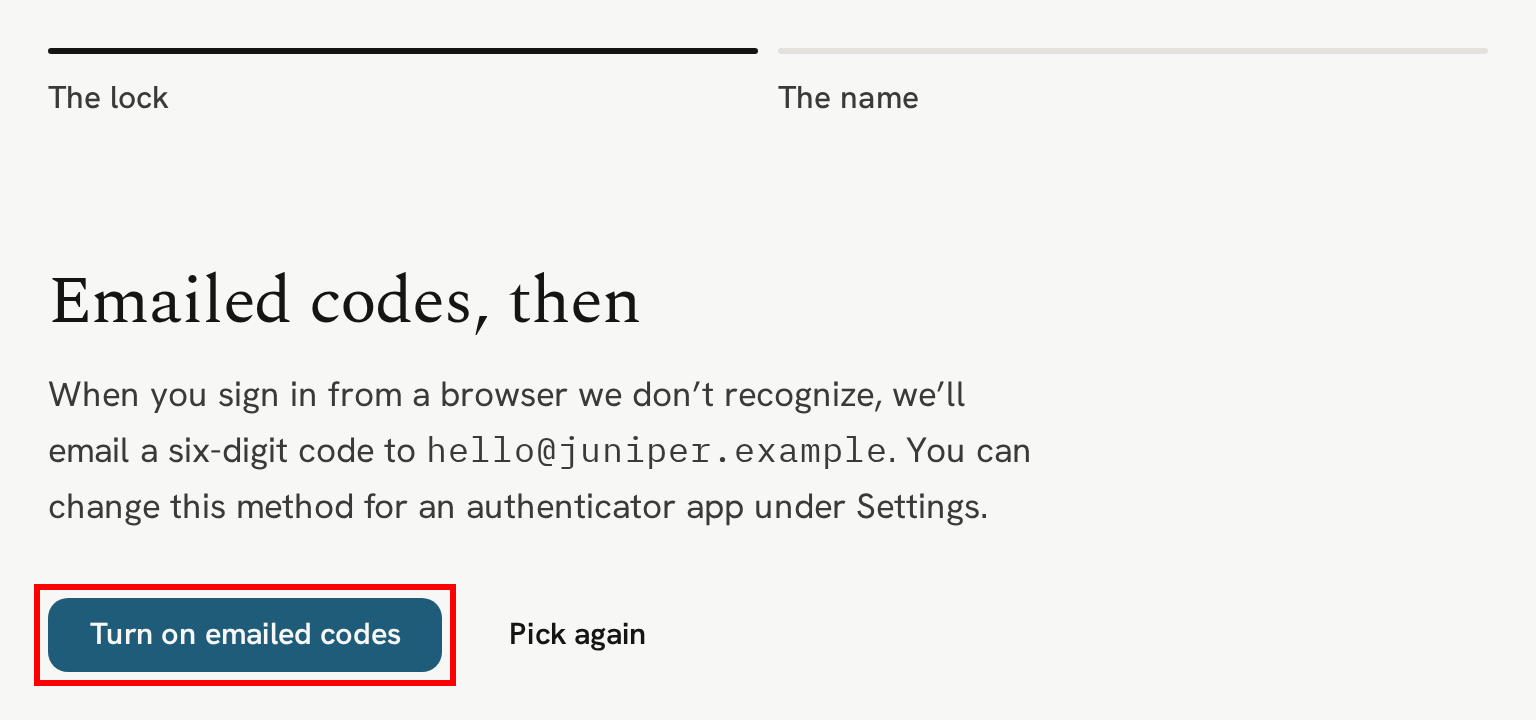
If you prefer not to use an authenticator app, select the "Confirm emailed code" option. We show you the address the codes will go to, which is the email you signed up with. When ready, click "Turn on emailed codes":
What your recipients call you
The second question is your library name and the contact email your recipients reply to. As you type, the example email beside the form shows where they appear:
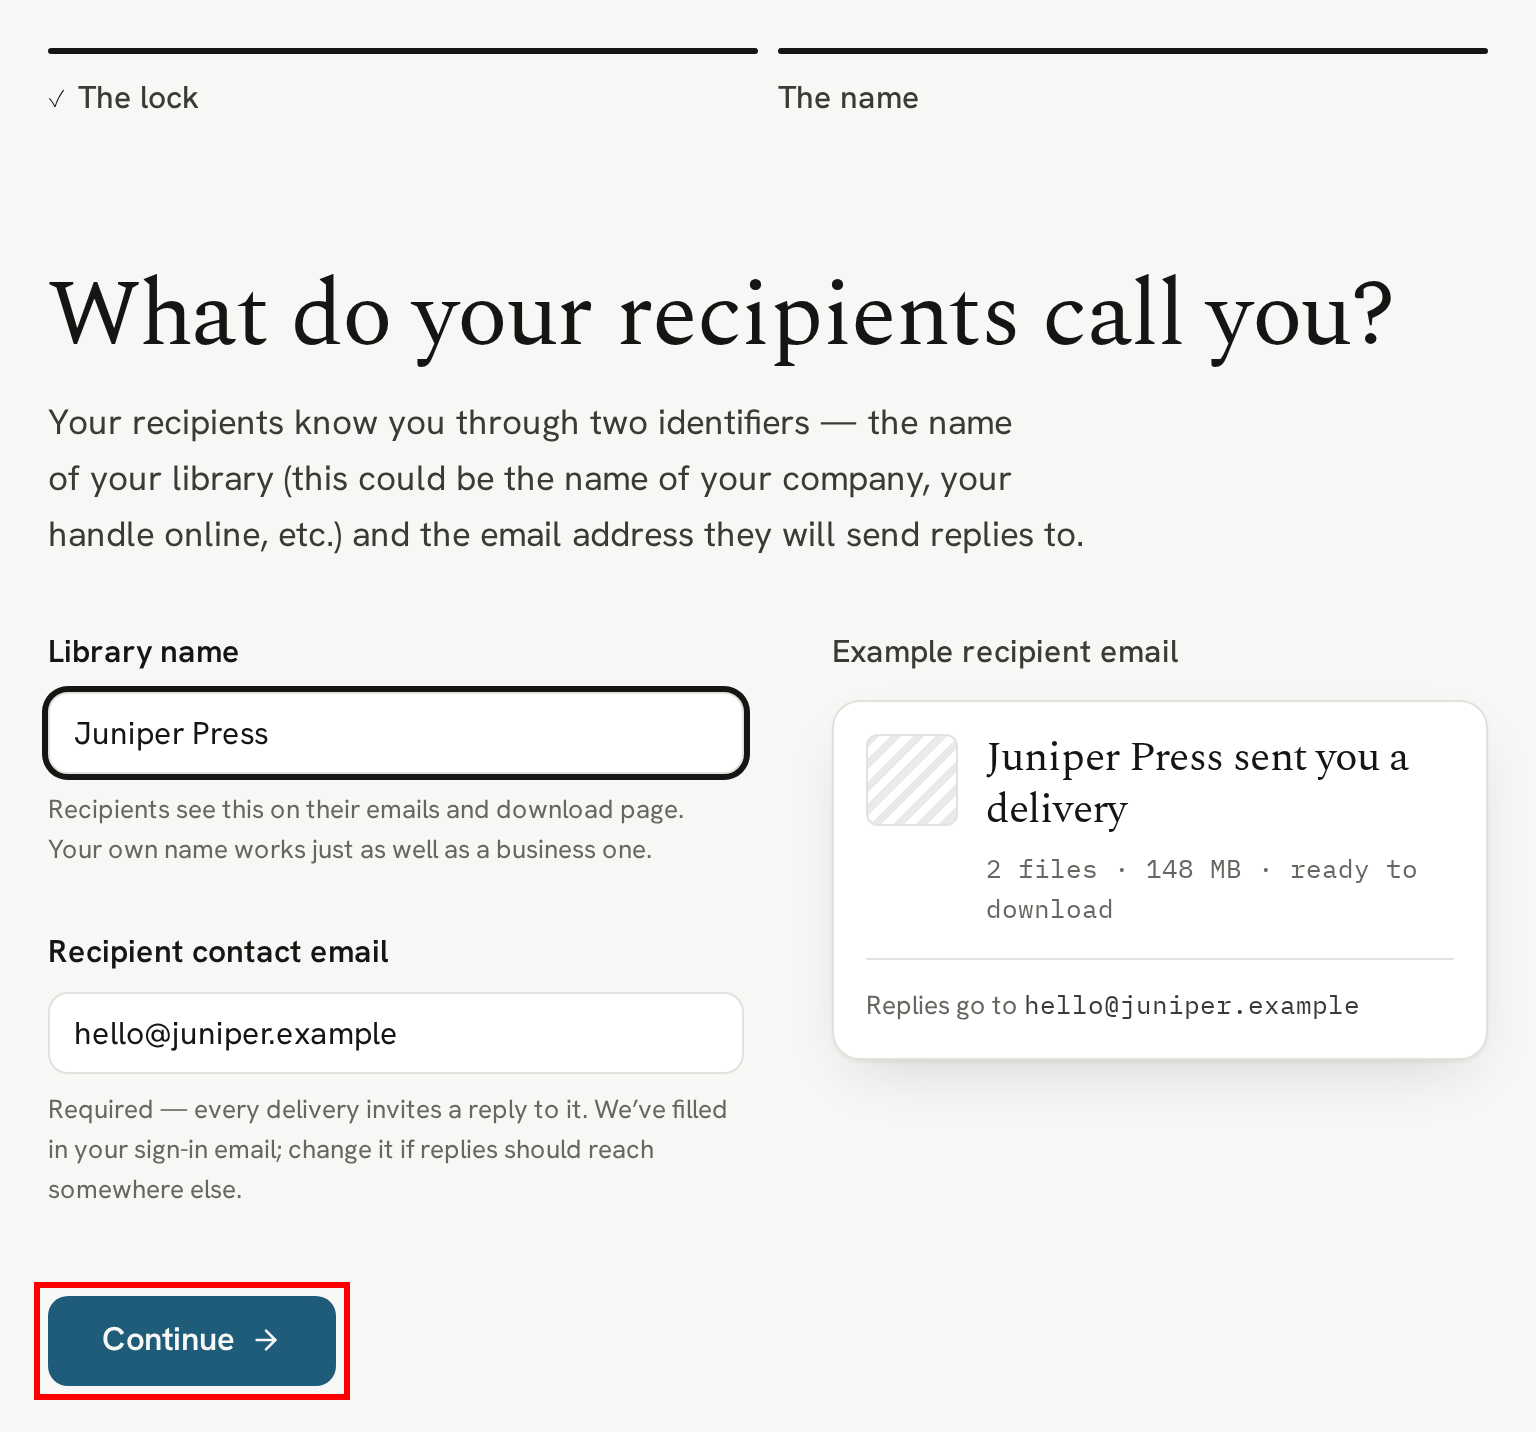
Your library name is shown to the recipient in multiple places and helps them understand who the delivery came from, and who created the content they are downloading. Your own name works just as well as a business one and you can change it in your Library settings.
The contact email is how your recipients get in touch. If they have a question about the content or want to access more items from you, this is the address they’ll use. Any delivery email they reply to goes to the contact email.
Your library is open
Click "Continue" and your library opens:
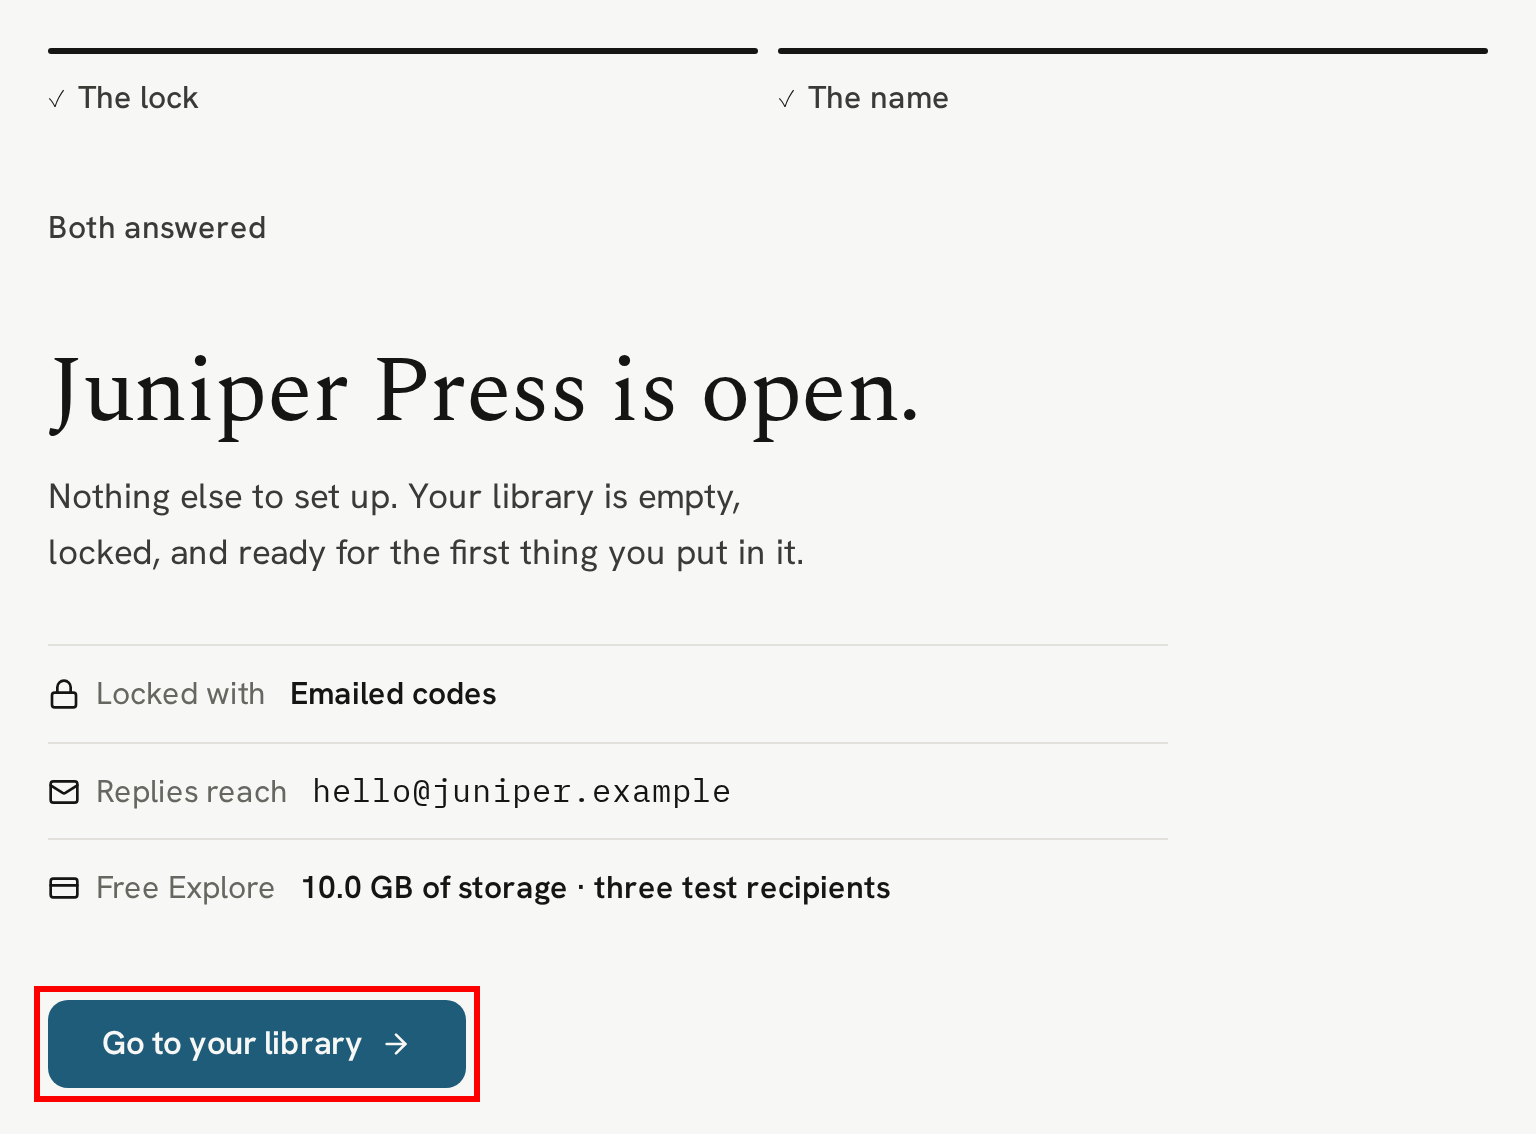
Click "Go to your library" and you land on your content page, ready for your first upload.
Next
Your library is set up. Next, upload a file, put it in a bundle and deliver it.